 The Fungal Records Database of Britain and Ireland
Introduction
Registering on FRDBI
Enter a record
This video shows how to enter location using the map
BMS simple record
The form is generally self-explanatory, and the hover-tips explain the purpose of each field. However, some fields have specific behaviour as follows:
Padlocks
Generally you will be adding a number of records, eg for the same date, site and people. The padlocks allow you to “lock” a field so its value is held for subsequent records.
Mouse-wheel
If you’re used to using the mouse-wheel to scroll up and own, beware that the map uses it to zoom in and out. If the cursor happens to move over the map as you scroll, you’ll suddenly find you’re zooming instead of scrolling! Once you’re used to it, it isn’t a problem, but it can be confusing the first time it happens.
Collection date
This is a text field with the format: 24/03/2016. For convenience a calendar is presented when you click on it, but you don’t have to use it (eg if you’re entering historical data). Or you can use the calendar and then edit the resulting date.
Fungus name
Type in the first part of the fungus name. or (better) use the standard 2-letter genus/3-letter species abbreviation (eg amrub for Amanita rubescens). Pause after typing and a drop-down list of names appears. This list includes both current names and synonyms and also English names.
Associated organism
This is a similar taxon-picker to the fungus name, but allows you to select any organism, not just a fungus. One of the design aims of the new FRDBI was that the host records (be they plant, fungus or animal) would be stored in the database as full records and available to researchers studying that group. So please try to record accurately, and where appropriate use species names rather than just genera. For dead wood, especially where it has been brought onto site (eg fence posts) use Substrate rather than Associated Organism.
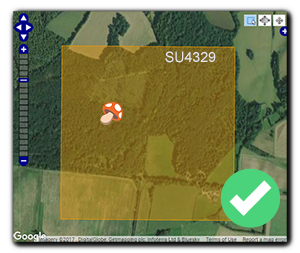
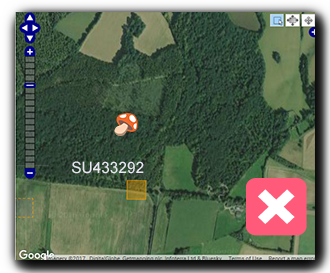
Map reference
It is often easier to click on the map to find the grid reference although it is still possible to enter the reference directly. For GB OS grid entries the format is AAnnnnnn with no spaces and even number of numbers.
Locality
Enter a locality name (ideally from the OS map). If you are going to want to reuse the locality, eg if it’s a regular foray site, click on Remember site. Next time you can just type the first few letters and it will be offered. The second menu item on the Data entry menu is My sites which allows you to review the sites you have entered.
People fields
For people who have registered on the system can be selected from a drop down list by starting to enter their lastname. Try to persuade non registered people to register as this will stop any confusion about identity. Where this is not possible use the same format in free text ie “Surname, First name” eg “Storey, Malcolm” or “Ainsworth, Martyn”.
Literature ref
The top picking list includes most of the regularly-used books and papers. It wasn’t felt necessary to distinguish which volume of various multi-volume series was used as it’s generally obvious from the taxon being identified, however, please make sure you choose the right edition. If the literature in question isn’t there, type it into Other literature.
Photos
You are encouraged to upload photographs of your fungus. You can currently load up to 4. Ideally these should be chosen to back up the identification.
Submit
Click on Submit when you have finished entering data for that record. Don’t navigate to a different page before clicking submit.
BMS advanced record
Submit
Again, click on Submit when you have finished entering data for that record. Don’t navigate to a different page before clicking submit.
Editing a record
- Go to Explore my records
- Click on the 'pen and paper' icon on the right of the record entry line
This will bring up the normal Enter page - Make any changes and Submit the record again
Deleting a record
- Go to Explore my records
- Click on the 'pen and paper' icon on the right of the record entry line
This will bring up the normal Enter page - Scroll to the bottom of the page and select Delete button